This is reprinted with permission from the author, Arkansas
Elk Hunter. He got the plans for building it from
Predator Masters and then wrote up his instructions, which you will find
below. Make sure you take all manufacture recommended safety precautions
when working with electronic equipment!
|
Homemade MP3 Game Caller
First let
me say thanks to The guys at
Predator Masters for their innovation on this project. I
copied this design from their forum members. Pay them a visit,
you'll learn a lot. Here is
another Tutorial written on the subject with some great
information.


It Works Great!
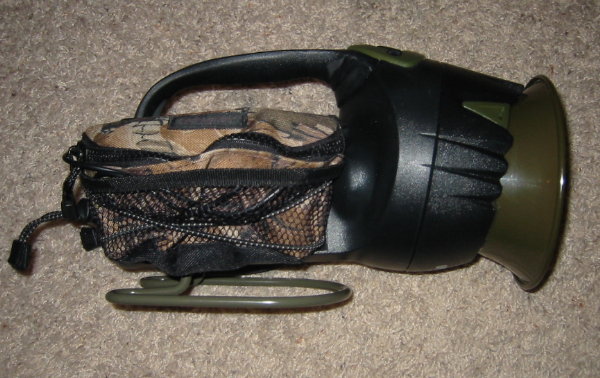
This is my Electronics
Caller.
I'm getting a good 100 yds with pretty good
sound quality. I also added a rigid antenna from Radio Shack to
the nady receiver that helped a lot. Use a 4' to 6' patch cord
between the transmitter and MP3 Player for better range. The
cord also serves as the antenna. I have about $150 in the
complete unit. You can transfer your sounds from tape , CD or
download some good sounds from
Western Rivers
|
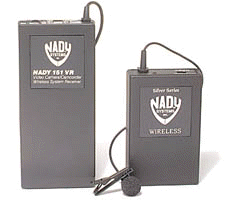
The heart of this caller is the Nady 351
wireless microphone system. Several versions area available. The 351 is
a little smaller but costs more than a similar unit Nady 151. I bought
mine new off E-bay for $72.
You can buy the Nady 151VR new
here for $73.95
|
A unit by Azden is also available and can be
purchased
here for $134.95. Go to the predator masters forum for a
discussion comparing the two brands.
|
The Caller is housed is a Energizer Outfitter
Flashlight Housing. The light comes with two little saddle bags on
each side. Walmart carried them and closed them all out in January.
You can order one from
Batteries.Com for $15.99 plus $3.99 shipping. There are many
other options for a housing, but this is one of the slickest I've
seen. The MP3 Player and transmitter fits in one side and the
receive fits in the other.
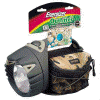
I used a 15 watt
horn from the Phantom Predator Call just because I a friend could
get me one at cost and they were green. I paid $20 but you can get
the same horn in white for $8
here. It's the SPECO SPC-5
|
 The lens needs to be removed and cut out for the
Horn Speaker. First remove the clear polycarbonate lens from the
black bezel. Next the Reflector needs to be removed from the clear
polycarbonate lens assemble by popping loose the glue joint. Then
cut the entire polished lens out of the polycarb lens. Watch the
threads and be careful not to damage them. There is a nice little
step on the inside you can follow all the way around. You want the
speaker to fit completely up against the black bezel..
|
|
Next you need a heat gun to widen the
mouth of the flashlight a little and allow the speaker to slide all the
way in to the bezel. (See the red circle in the figure to the right)
With the bezel removed, heat up the housing with a heat gun until it's a
little soft and shove the speaker down into the housing. Allow it too
cool with the speaker in place. Be careful not to melt the switch or
warp the threads.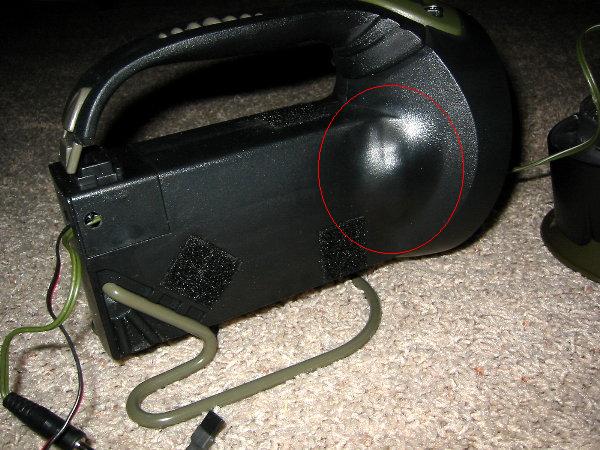
There are some ribs on the inside of the
housing that guide the D-cell batteries in place. Remove them with a
wood chisel to give more interior space if you like.
|
After fitting the housing as shown above, you need to
glue the horn in place. You will need to cut off the mounting brace
from the horn so it will not hang up as the horn and bezel are
screwed onto the housing. Grind it flush with the rest of the horn.
There is a little extra material on the switch that can also be
removed to make a little more room. You don't want any undue wear on
the speaker wires as it is assembled.
Position the speaker in the center of the bezel assembly and put
just enough hot glue on it to hold it in place. Test the centering
by screwing the bezel onto the housing. Adjust the horn position so
that you feel no resistance and it is rotated. Then remove it and
add more hot glue. Glue it from the inside and just fill up the
groove between the speaker and the bezel.
|
I wired into the existing switch to provide power for
the auxiliary amplifier and the Nady receiver. The switch can be
removed with 2 screws. I also added a LED to the circuit so I can
see if the switch is on or off. (See figure to the left). also added a LED to the circuit so I can
see if the switch is on or off. (See figure to the left).
I wired in a 9 volt battery clip that snaps onto
an 8 cell AA battery holder. I can add 8 NiMH batteries to get 9.6
volts (8 x 1.2 volts = 9.6 volts) or add 6 Alkaline Batteries for 9
Volts (6 x 1.5 volts = 9 volts) by using two fake batteries made
from aluminum Rod in place of 2 cells.
I used a hobby shop Servo Connector for the
auxiliary battery supply for the receiver. I opened the receiver.
and soldered the servo connector wires to the existing 9 volt
battery leads of the receiver.
|
Drill a small hole in the end of the flashlight
housing just large enough to get the battery connector and speaker
plug through. Cut a small hole inside one of the pockets to run the
wires into the saddle bag that the receiver will fit into and you
will never see the wires when the bags are in place.
The Diagram on the left shows how I wired into the
existing flashlight switch and use a LED to indicate on/off status.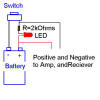
Thumbnail .... click to
enlarge.
|
|
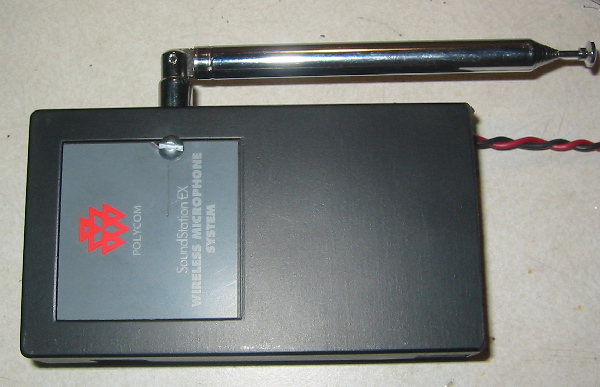
How to add a telescoping antena to tha Nady 151VR LT
|
|
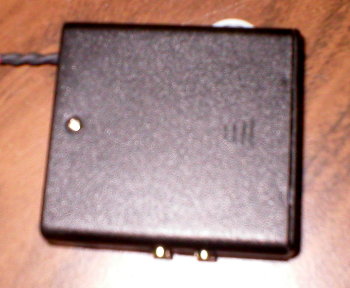
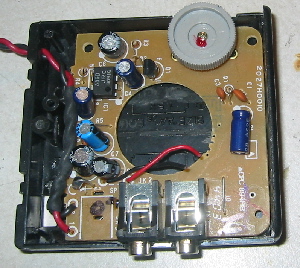
I also added a small
radio shack Amplifier to the unit. I took the board out of the
Original housing and added it to a
4 AA battery holder. I used a dremel to remove all the internal
features of the battery holder and the board fits perfectly. Use the
dremel to cut a slot for the Volume knob and the input and output jacks
and your done.
Originally I was getting a little
feedback when using a single power source to power both the amp and the
receiver. I added a
Isolation Transformer and the problem went away. It is the little
green square in the middle of the Amp.
|
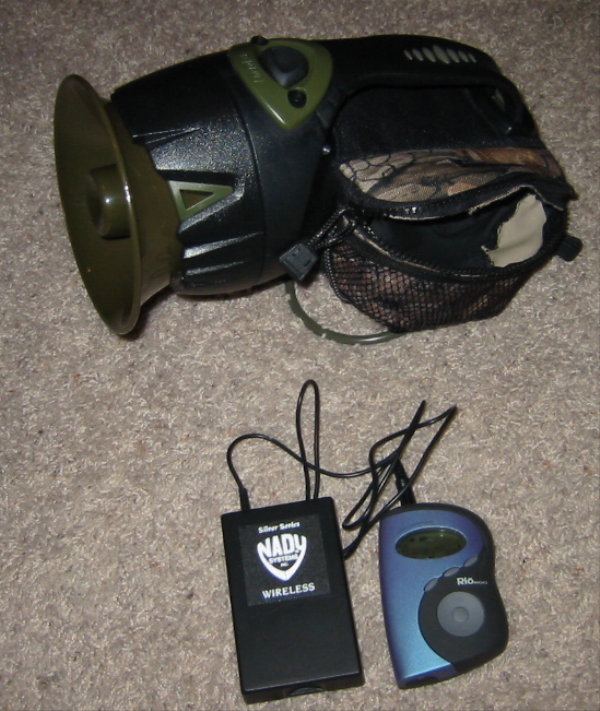
The last piece of the puzzle is the Player. Any media
player can be used: Cassette tape, CD, MP3. I selected a Rio Sonic
Blue 128meg player. The Rio is compact but large enough to handle
with gloves. It also has an easy user interface and lighted display
and displays song titles for easy selection in the field.
Any MP3 player will work, so make your best deal.
E-Bay is the way to go there. Just watch the "buy it now"
selections.
Just let me say once more, I just copied this
design from the guys at Predator Masters. Give Credit where Credit's
due. Thanks Guys
I hope this might help someone else out a little.
 |





 also added a LED to the circuit so I can
see if the switch is on or off. (See figure to the left).


